How to install google tag manager on WordPress?
You don’t know a lot about google tag manager and you need to install it on your WordPress from a recommendation so you can follow this article to know everything about google tag manager, how to use it and how to install it.

What is google tag manager?
As a website owner, you will need to add multiple code snippets to track the conversions, traffic, and gather other analytical data.
Google Tag manager helps you easily add and manage all of these scripts from a single dashboard.
There are built-in tag templates for Google Analytics, Adwords, DoubleClick, etc. Tag manager also works with several third party analytics and tracking platforms.
You can use google tag manager to use custom HTML codes to add your own tracking or any other code to add more features.
This saves you the time of adding and removing tags from your code and rather manage it from an easy dashboard. Not to mention, all of these scripts are loaded in one script.
1.Creating a new google tag manager account
Google tag manager can be shorten to GTM. So you can visit the website of GTM and sign in or sign up as a new user. If you’ve already used Google Tag Manager before, this is where you’ll see a consolidated view of your accounts.
- For creating new account, you’ll need to enter your account details. Give it a name that you can recognize from amongst a bunch of others. You will write the name of your website as an example “zytheme”. Select your country from the drop-down box, choose whether or not you want to share data anonymously, and click “Continue”.

- The name of the site will have to be the same on which you plan to include the GTM code for this account. Don’t use “http” or “https” to qualify your site name. Just start it with “www”, otherwise, it’ll throw an error. Remove any trailing slashes as well.
- Also you will choose on which platform you need to track the website (web, iOS, android). Then press “create”.

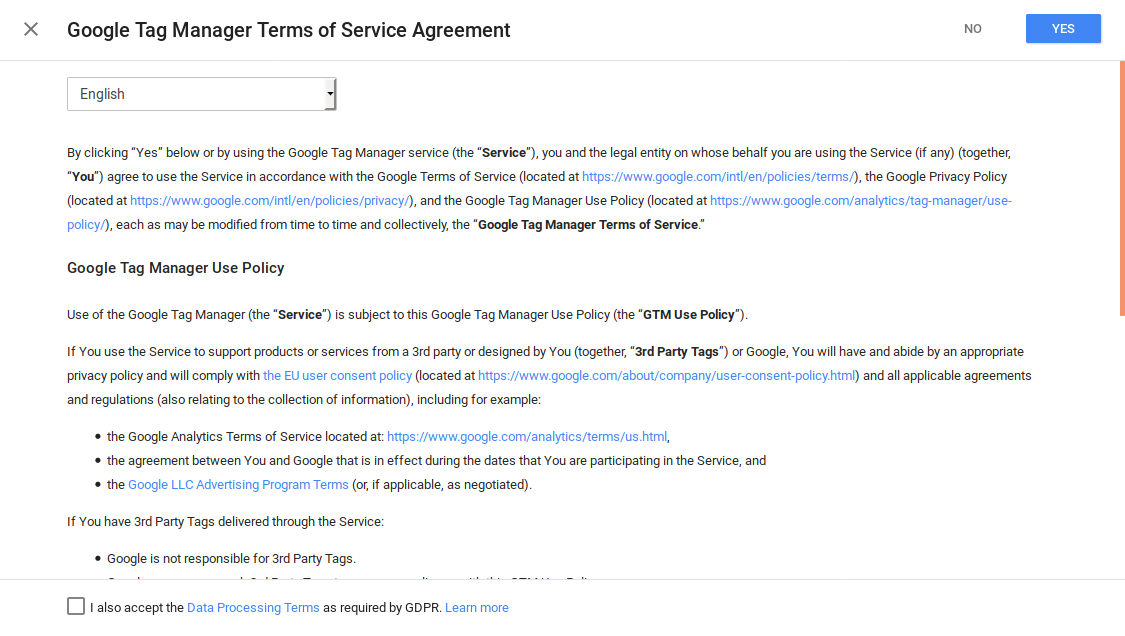
- You need to agree on the terms conditions. Just click “Yes” on the top right, and tick the checkbox at the bottom.

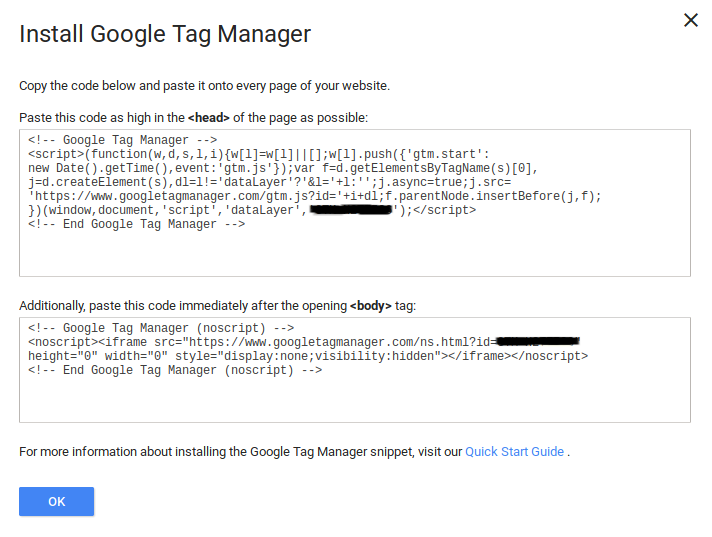
- Once you’re done with the legal, you’re given the code to insert into your website.

As in the image, there are two pieces of the code on for the head and other for the body. Ideally, both need to be placed as high as possible in their respective tags. Now, we should try and put it as high as possible without compromising our site or our functionality.
2. Inserting body and head code in WordPress
We need to google tag manager with your WordPress without using any plugins so we have to add the code to functions.php file located in the theme, or in some other location where we place the custom PHP code.
You can add these ode to the header.php file in the theme files but this approach isn’t so good for two reasons.
First, themes are different from each other. While there’s a general theme structure, not all themes work the same way. So modifying your files in a theme specific way is dangerous.
The second problem is that whenever your theme updates, it will erase the changes you make. So if you want to insert the code to the WordPress without third party plugin you need to create a child theme.
If you don’t, your edits will simply be wiped out the next time your theme updates. This article will help you to create a child theme. In the WordPress dashboard, go to Appearance -> Editor as shown here.
This will bring up a list of theme files on the right-hand side. Scroll down till you find “functions.php”. Click it, and this will open it up for editing in the text area. Now paste the following into it at the very bottom.
[php]
function add_gtm_to_head() {
$google_head_script = <<<EOD
<strong><!– Google Tag Manager –></strong>
<strong><script>(function(w,d,s,l,i){w[l]=w[l]||[];w[l].push({‘gtm.start’:</strong>
<strong>new Date().getTime(),event:’gtm.js’});var f=d.getElementsByTagName(s)[0],</strong>
<strong>j=d.createElement(s),dl=l!=’dataLayer’?’&l=’+l:”;j.async=true;j.src=</strong>
<strong>’https://www.googletagmanager.com/gtm.js?id=’+i+dl;f.parentNode.insertBefore(j,f);</strong>
<strong>})(window,document,’script’,’dataLayer’,’GTM-XXXXXXX’);</script></strong>
<strong><!– End Google Tag Manager –></strong>
EOD;
echo $google_head_script;
}
add_action(‘wp_head’, ‘add_gtm_to_head’);
function add_gtm_to_body( $classes ) {
$block = <<<EOD
<strong><!– Google Tag Manager (noscript) –></strong>
<strong><noscript><iframe src="https://www.googletagmanager.com/ns.html?id=GTM-XXXXXXX"</strong>
<strong>height="0" width="0" style="display:none;visibility:hidden"></iframe></noscript></strong>
<strong><!– End Google Tag Manager (noscript) –></strong>
EOD;
$classes[] = ‘">’ . $block . ‘<br style="display:none’;
return $classes;
}
add_filter( ‘body_class’, ‘add_gtm_to_body’, 10000 );
[/php]
Replace the first block in bold with the first piece of code from Step 1 that is to be inserted into the <head>. Replace the second block in bold with the snippet that is to go into the <body>. These two functions tap into the “wp_head”, and the “body_class” action hooks to insert the code into the appropriate places.
Don’t forget to save the changes.
3. Testing google tag manager
To check if the insertions have taken effect, click “OK” in the screen within google tag manager that displayed the code. This will take you to the GTM dashboard. Now click the “Preview” button on the top right.
This will show an orange bar indicating that it’s in “Debug” or “Preview” mode. Now open a page of your site in a new tab. You should see a pop-up bar at the bottom belonging to Google Tag Manager. And on the right-hand side, you should see your google tag manager number as shown here.

